How to Make a Timeline
Make your own timeline for Homeschool
Making a timeline is a wonderful thing to do as part of your homeschool studies. These ideas, templates and resources will make it easy for you to make your own timeline.
How to Make a Homeschool Timeline
An important part of creating a timeline is to find one that suits your space, time available and level of commitment! Luckily, there are lots of different timelines that can be adapted to suit you
Things to think about before you start:
- How much space do you have? If you have limited space there are several options other than a wall timeline.
- How much set-up time can you make? Is the effort of setting up a timeline stopping you from actually getting to it? Scroll down to look at the easy book versions for instant setup times.
- How to divide the timeline. A good rule of thumb for the 'whole of history' would be to divide the space into about 100 equal sections. Then print out my dates document (in the resources section) to cut out and stick the dates onto each section.
More ideas for making a homeschool timeline that suits your family.
Wall Versions
Poster or Wall Timelines
A timeline can easily be made on the back of an old poster or large piece of card. Although it can take some effort to set, this method is easy to add to - and because it is 'out in the open' it will harder to forget about.
You don't have to try to make a timeline of the whole of history if you are short of space. Choose a few different periods to feature, or focus on one event. Going big in this way works great for younger kids who will struggle with adding tiny characters.
The poster/wall can be divided either vertically or horizontally - or your could even draw a snake shape.
If you are using a wall, then you could use a long piece of paper around the room to represent time. There are good instructions for a 'strip' type timeline in the resources section.
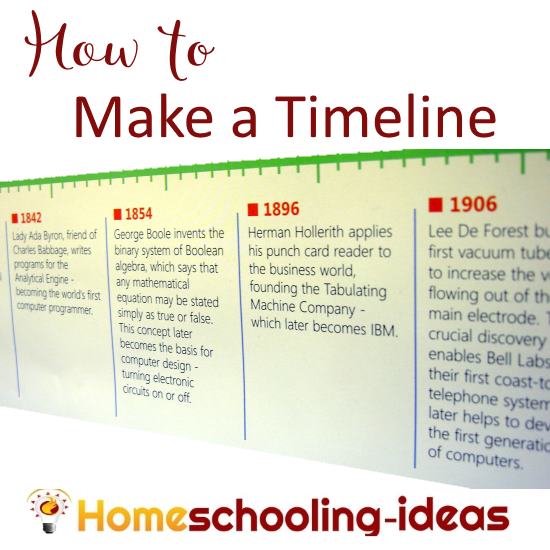
Here is an example of a nice simple timeline
String or Ribbon
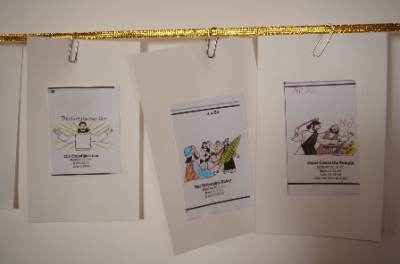
Need something a bit more portable? A ribbon timeline would be easy to hang when you need it. This type of timeline works well with index cards - simply hang the cards in the right order across the string.
|
The benefits of this method is that you can re-do your timeline to correspond to the time period you are studying. You need the cards to be attached firmly (so they don't fall off), but also easily removed. Paper clips are good - or the small pegs that you get to hang christmas cards.
Another way to make a timeline would be to use those sticky strips that are often sold to hang Christmas cards. Buy a strip that lets you re-arrange the cards (they often use velcro).
One of my readers sent me this great idea for a clothesline timeline.
Pull-Down Roller Blind
If you are really short of space, but would love a wall timeline, then a pull-down roller blind makes a great compromise. The advantage of this is that it can be hung from the ceiling and pulled down when required - then rolled up and out of the way when you aren't using it. You could also hang it on the front of a bookcase.
Draw out your timeline before you hang your blind. You will need to fix your figures firmly - I would suggest you glue them in place.
Book and Card Versions
NotebookingNotebooking really is the simplest way to make a timeline. All you need is a ring binder!
 The advantage of this method is that you can get started with almost no preparation! Write a page about the period in history you are studying - punch the page - and add it to your notebook! The pages can be sorted as you add them to make them chronological.
If you want to be a bit more methodical, then I have some notebooking pages you can use on my homeschool timeline resources page. Use two pages per time period to fill your ring binder. I have divided the pages into four sections so you can separate aspects of history - US History, world history and politics for example.
Lapbooks
Lapbooking is a really fun way to make a timeline. Make a lapbook for each time period you want to study.
You can either connect the lapbooks together to make one large timeline book - or just store them in a box folder in chronological order.
Accordian Books
Accordion books are pull out books. Check out the timeline at the beginning of this (long) video.
Book of Centuries
I have separated the 'Book of Centuries' from Notebooking because these are generally done in spiral bound notebooks and set up at the beginning.
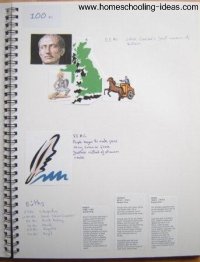
Charlotte Mason said
"The Book of Centuries, is a great joy to the owner, and even in these busy days it is possible to find some time, however short, to add an illustration from time to time. Children always take a keen delight in their books. There is no need to be an artist in order to have quite an interesting book—neatness and accuracy are essential though. Museums will be clothed with fresh interest to keepers of these books, who will be able to recognise objects which have already become familiar old friends through their Books of Centuries."
Index Cards
Using index cards is a fun way to make a timeline.
Use one card for each time slot you wish to cover and file in chronological order. This is a flexible system because you can add cards as you need them. The finished cards can be displayed on a ribbon timeline, or used for playing sorting games.
Century Charts
Another way of making timelines is to use pages of charts with 100 squares on each page. Draw an image or symbol to represent an event happening for each 'year' within the century.
A great way to start with this, is to use the century in which your child was born, and include events in his life.
For more details, see this Charlotte Mason article
Electronic Versions
If you prefer working at your PC, then there are several different ways you can make a timeline electronically. The advantage of this is that you can cut and paste images into the timeline without having to print things out.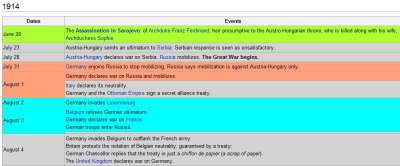
Online Timelines
There are several companies that provide free online software for you to make a timeline (such as Timeglider). Just sign up to start.
AZZ Cardfile
AZZ Cardfile is a nifty piece of software that lets you store information in a 'cardfile' type format. I use AZZ for a lot of things because I can set up tabs for the cards exactly as I could a box of index cards.
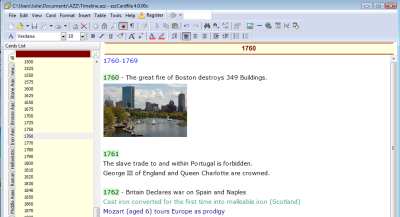
The software is free to download for a 'permanent' trial. I have made a timeline template with the software containing 100 cards divided into several time periods.
PC Word Processor or Spreadsheet
You can easily make a timeline using your PC word processor or spreadsheet software. Still looking for ways to study history?
History is a wonderful subject to study with the right homeschool history resources.
Homeschooling-Ideas › Homeschool Timelines › Make a Timeline
Lovely messages sent from visitors like you:
Oh my goodness! I am a home schooling mum of 4 and I have NEVER found a better site! Thank you so much.
Blessings, Jenny (New Zealand)
I wanted to say THANK YOU for your fabulous website. I found your website, and finally I have the confidence to take the plunge and take my daughter out of school and educate her at home, thank you, thank you.
Marina (UK)
I cannot get over how much great information and super ideas you have here. Fantastic!
Ruralmama (USA)
This is simply fabulous!! I just now found this site and I'm so excited!! The opportunities and suggestions as well as the need to inspire are exactly what I have been searching to fulfill!! I'm so thrilled to get started and even more excited to continue to explore all of the fabulous suggestions and creative ideas you have offered here!!! Thank you, thank you, thank you!
Jennifer (USA)

